

What Is the Best Temperature to Paint a House
Painting a room isn't as like shooting fish in a barrel as loading up a roller and slapping it on the walls. From picking your paint to prepping the walls to painting, we'll show yous how to do information technology the right way. We'll too share our tips & tricks to make the job go smoother and quicker. If y'all desire to larn how to paint a room – read on!
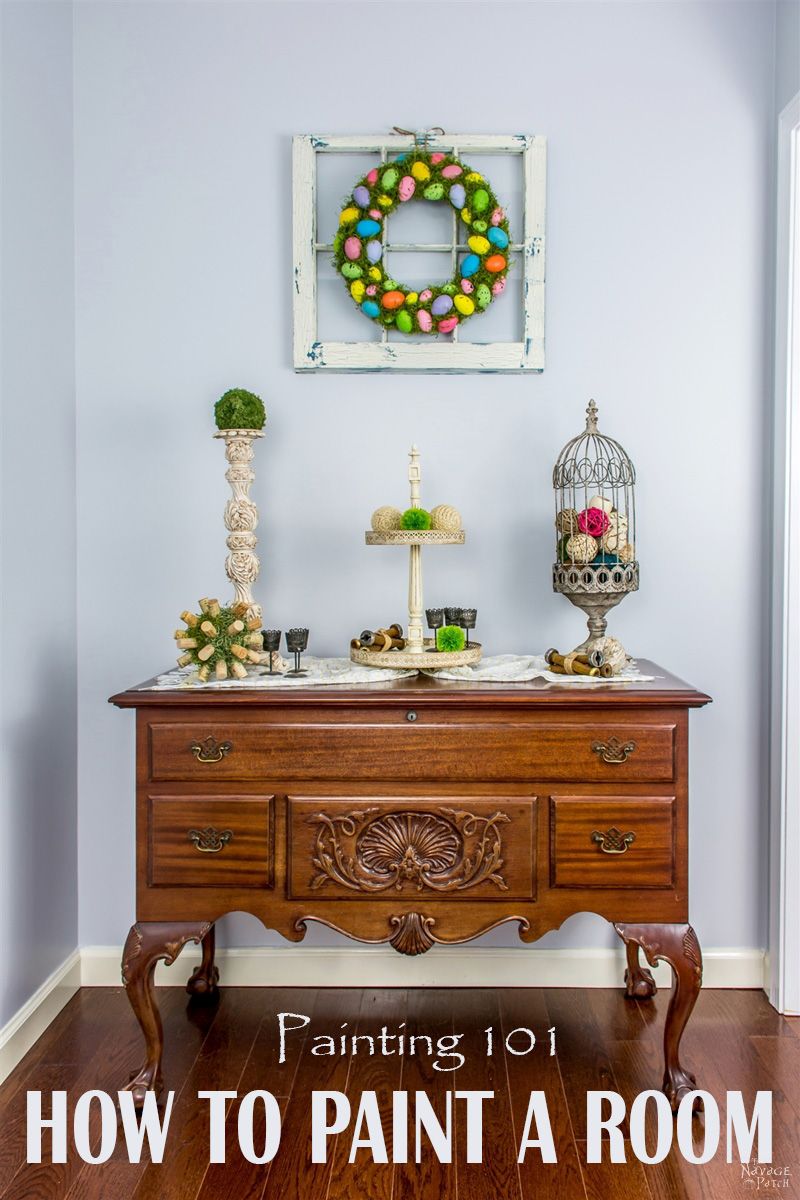
Nosotros love the color of our living room walls (Behr Natural Grayness), but it sure took a while to find the correct color! The aforementioned goes for all the other walls in our house. We've painted every wall at least one time, many of them twice, and some of them 3 times! Nosotros are at present expert painters, and we're not done all the same! Since Greg has limits for how many times he's willing to repaint a wall, lately I've been doing most of the painting. I however accept a few rooms to go, and I'm set to get to it, so what meliorate time to prove you lot the tricks and techniques I've learned from my three years' experience in painting walls?
Only before jumping in to how to paint a room, I want to give a "LONG POST" warning, then you lot tin grab a cup of coffee or tea before conveying on with the residual of mail.
Since this is aconsummate guide on how to paint a room, first let's talk a fiddling nearly the paint itself: you know…the differences between high-quality paint and standard paint…or are there any differences at all? Autonomously from the price, the biggest difference between high-quality and standard pigment is the amount of what I call goodiesthey have. First, permit's await at the usual suspects that y'all'll find in a can of pigment. Don't worry, this won't exist a boring chemistry lesson…it's all good info, actually! 😉
All paints take two types of pigments: prime number and extender. Prime pigments provide the colour and hiding power (think of hiding power as the optical performance of the paint – the amend the hiding ability, the better ane coat will encompass and "hibernate" the surface underneath the paint). Prime number pigments are the expensive pigments. Extender pigments are referred as fillers, and they are less expensive They contribute very niggling to the colour and are added to the pigment to increase the pigment volume at little additional cost.
Then there are additives and binders (or resin). Binders contribute qualities like adhesion, gloss, durability, scrub and stain resistance, moisture and crevice resistance etc., while the additives would contribute to shelf-life, overall feel, surface-life (on-the wall life) and UV- and rust-resistance of the paint.
And and so there are solvents (primary and co-solvents), which besides define the quality of the paint, only non with a positive correlation. Chief solvents liquefy the paint and carry the solids. In other words, if yous are buying a water-based paint, then the primary solvent would exist h2o. Co-solvents, on the other hand, assist your paint class a tough and durable picture show. But with the low VOC (Volatile Organic Compounds) trend these days, paints tend to take less co-solvents. While the chief solvent usually constitutes fifty% to 75% of the total pigment volume, co-solvents only business relationship for 0% to 10%.
Among all these ingredients, pigments, binders and additives are what I call my goodies, whereas solvents are the liquid. The bottom line is that a high-quality paint will have less liquid and moregoodies in information technology, and would therefore give a meliorate experience while painting and better end-results when finished.
At present that we know more than about the paint itself, let's talk well-nigh choosing the color and the sheen.
Tips On Choosing The Color And The Sheen
Consider the bogus and natural lighting of the room.
When we starting time moved to our domicile, I couldn't wait to modify our wall colors. Therefore, despite all the great communication I got on why I shouldn't decide on the wall colors before living in our business firm for a few months,I decided that we should jump right in and pigment everything. And y'all know how well that decision worked out, right? We ended up painting our entire business firm about twice and some rooms even 3 times! So my showtime tip on this topic will be:

This is what I phone call the Gilded Dominion. Lighting is the about important factor, because it changes the appearance of colors:
- Direct sunlight shows the colors in their natural class (without any additional affects).
- Indirect sunlight tends to make colors appear warmer than they actually are.
- Artificial lighting can cause colors to appear warmer or cooler depending on your lighting choice (incandescent warmer, fluorescent cooler, etc).
In our beginning circular of painting the business firm, nosotros were in our "little did we know" era, hence we happened to paint our living room (which gets a lot of straight & indirect sunlight) with Martha Stewart's Cayenne color (a very nice terracotta-ish colour). By that summer, Greg and I couldn't deport spending time in that room, because it just felt also hot! At present that we know ameliorate, we learned how lighting and color can change the "perceived temperature" of a room. Now we tend to go with warm colors for our north-facing rooms and cool colors for our southward-facing rooms.
Use the color illusions to your benefit.
Painting is all most creating illusions, and colour is the all-time tool, as it can change or define the experience of a room.

Additionally:
- subtle colors make a room seem spacious.
- intense colors brand a room seem smaller.
All of these illusions are influenced by the lighting and the colors around information technology. Then with this, we again visit dorsum to the Golden Rule, as light is one of the main factors that affects a colour'southward advent 😉
Darker colors tend to testify more than imperfections on the paint's surface and the wall underneath due to their depression Titanium Oxide (TiO2) content. TiO2 is the paint that gives pigment almost of its hiding power. But the content ratio of TiO2 also defines how night your paint can exist tinted, equally it is a white paint. This is why darker colors normally have lower hiding ability than lighter colors. Counter-intuitive, correct?
First, determine on the sheen, and then narrow downwardly your color choice.
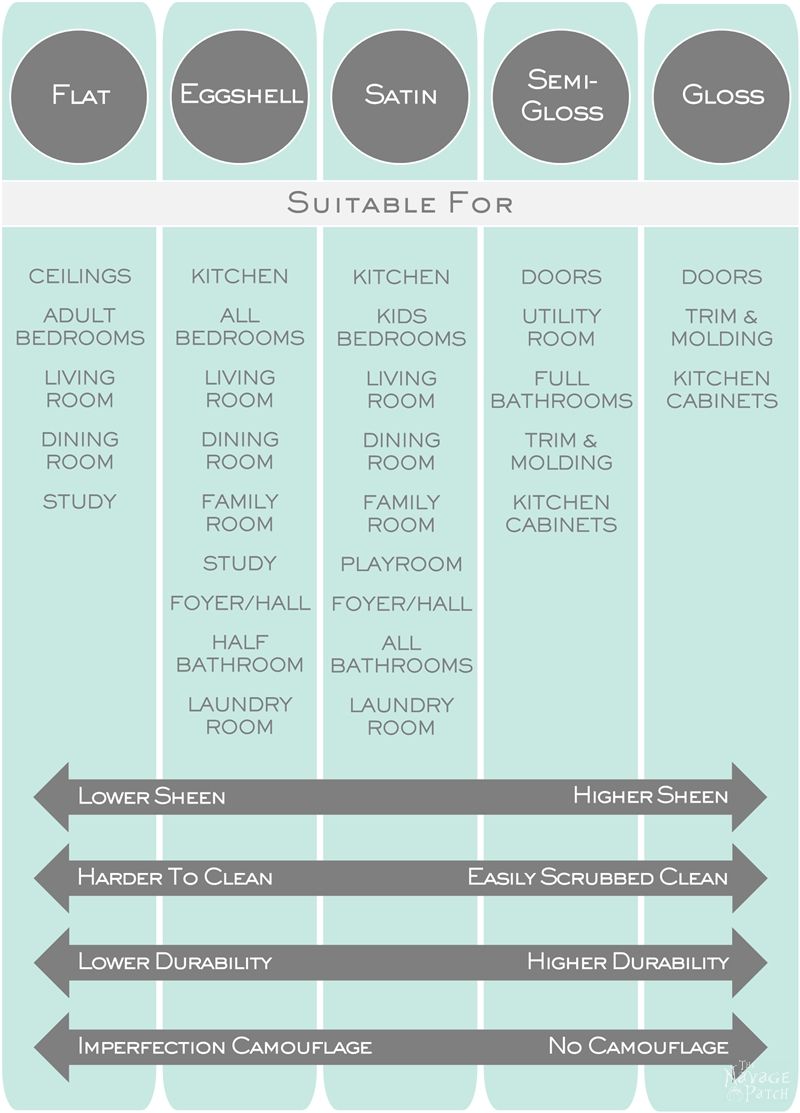
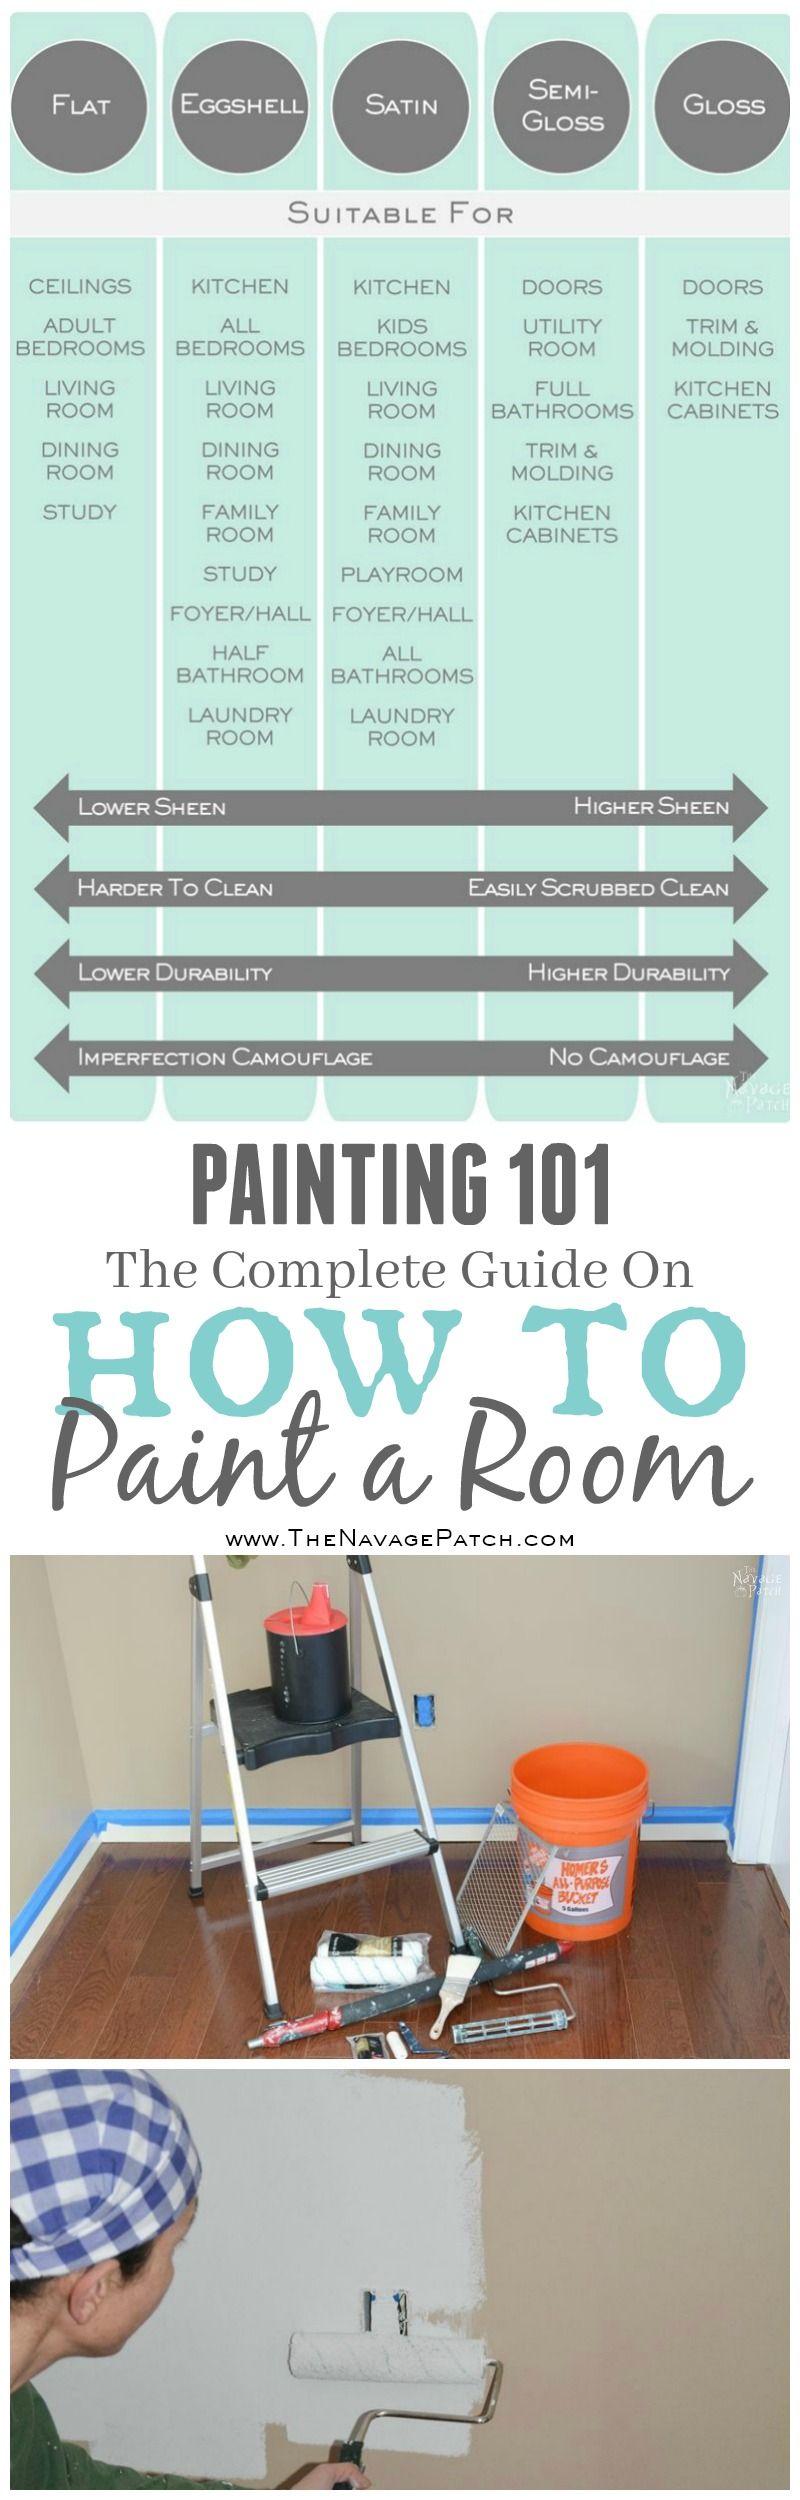
Sheen is a mensurate of reflected light, so it influences a colour'due south appearance when viewed from dissimilar angles. Glossier sheens tend to show surface imperfections more than flat sheens, since the angles created by the imperfections reverberate lite differently.
Sheen affects the durability and cleanability of the pigment: the glossier the sheen, the more than durable and cleanable the paint. That said, touch-ups are ever easier with the lower-sheens similar flat and eggshell, as they will hide the imperfections much amend. Therefore, the all-time communication I can requite on this topic is:

As a picture can tell a g words, I prepared the table below to provide some guidance on how to choose a suitable sheen based on the room/expanse. I hope you'll find it useful! 🙂
Paint chips are good, but pigment samples are better.
Nearly brands requite their pigment chips for free, and they are helpful when trying to narrow downwardly your colour choices. But one time the colors choices are downwards to two or three, try the paint samples on your wall to help you decide on the final color.
Equally different light conditions affect the advent of colors [never forget the Golden Rule! 😉 ], here are a few things to go on in heed when trying the pigment samples:
- Pigment two coats of big swatches (even larger than 12″ ten 12″) to resemble the terminal expect of the wall.
- Leave the swatches on your walls at to the lowest degree a day, so you lot tin can see how the colour changes with the low-cal over the course of a day.
- If you are planning to use the same colors in another room, then instead of painting the big swatches directly on the walls, simply pigment a piece of drywall or cream board with 2 coats of sample pigment. This volition let you to motility the swatches to whatever room or any place in a room to see how light affects the color throughout a day.
- Sure brands do not brand their paint samples in all sheens, so but go for the closest sheen when you are ownership your sample.
And as a bonus hint…
Trust your Designated Photographer's eye!
I know this sounds a bit strange, but every home has a Designated Photographer who has a amend heart for photography than other family unit members. In our home, our Designated Photographer is Greg! What can I say…plain my eyesight is not that great, and I tin can't even differentiate the undertones in certain colors, merely as I can't distinguish dark navy bluish from blackness…just of grade, nosotros discovered this only after nosotros painted our home almost twice with the colors I chose! LOL. I know, correct?
Nowadays, I only join in when information technology comes to the "calorie-free/dark/cool/warm" selection and ask him to choose the color that will work best in that room. And oh male child!..does he do a not bad chore with that!
Then, trust your Designated Photographer's heart, equally he/she volition run into more than you, including light illusions, how colors work together, permanent features and other details of a room. Seeing all these aspects becomes of import when you desire the pigment color to highlight all the great features in a room and minimize the attending on the poor areas.
At present that we have talked about what to consider when choosing the right color and the sheen, let's have some action, shall nosotros?
How To Paint A Room
Planning
Although planning to paint a room doesn't take much, hither are some things to keep in mind:
- If you are planning to paint an unabridged room from ceiling to flooring, beginning with ceiling first, because unless yous embrace your walls entirely, you may end up splattering them. Once you are finished with the ceilings, then you tin can motility on to walls, then the trim and finally the floor.
- If you lot are painting the flooring, start with the farthest corner from the door and make your way towards the door. Although this is mutual sense, on some of the structure projects I have worked, I have seen painters who forgot this simple dominion and either had to pace on the painted area or had to await for the pigment to dry out properly to be able to exit the room!
- I usually pigment in the autumn, wintertime or spring, as those are the times we have low to normal humidity in our business firm, and the room temperature is always around 70ºF. These are the perfect weather for taping and painting.
- If y'all are buying the pigment from Home Depot or Lowe's, keep in heed that you can't return it – even the unopened cans – if you alter your mind or don't similar the colour or just have too much leftover pigment. Before buying paint, calculate your need so you lot purchase only plenty: typically, a gallon of paint will embrace 200 sq feet with 2 coats of paint (400 sq feet with a single coat). That said, covering textured, crude or un-primed surfaces may require more than pigment.
Prep work
Prep work is the near tedious part of all, but trust me when I say: the better your prep work is, the quicker and easier your painting will exist, and the better cease-results yous'll go. I don't cut corners when it comes to prep piece of work!
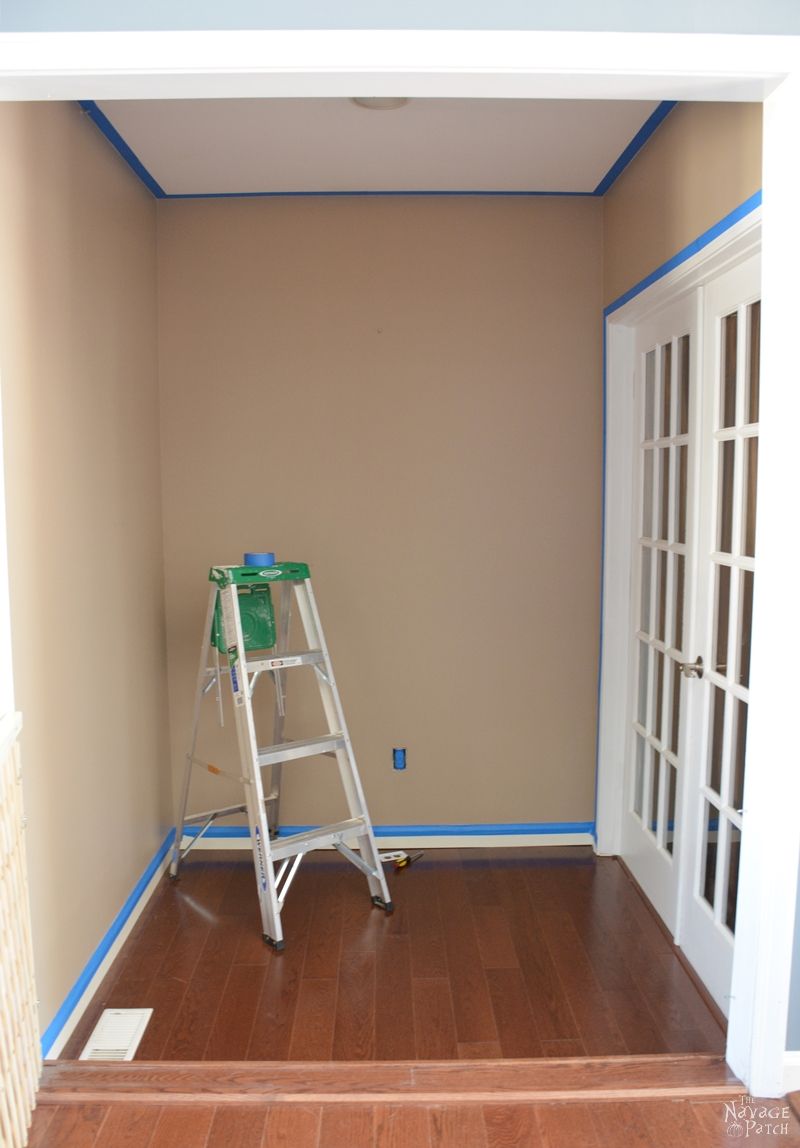
Every bit I prefer working with a roller more than than working with a brush, commencement I start by taping off almost everything in a room: trim, edges of the ceiling, and the outlets/switches. Although taping all these areas takes time, I save that and a lot more during painting, since I minimize the need for cutting in. Unless I am painting a room with a popcorn ceiling or painting a tight area where I tin't fit a roller, I almost never utilize a brush when painting walls.
Here are my DOs and DON'Ts for taping:
- As masking record occasionally leaves a mucilaginous balance backside, I prefer using the 1.88″ original blue painter'due south tape. And no… at that place is no demand to get fancy with the tape, since they all do the aforementioned job, if you know how to seal the edges.
- Before taping, I wipe the trim and the edges of the ceiling with a clean, dry textile, as painter'south record sticks meliorate to grit-complimentary and dry out surfaces.
- I endeavour to tape using long strips. Longer strips assist prevent paint from seeping underneath the record.
- I never stretch the tape, because stretching will prevent the record from sticking properly and will allow paint to seep underneath.
- In one case I place the tape, I burnish it, every bit this helps to remove the air bubbles and helps it to stick properly. In other words, I rub the tape with my finger nails, applying enough force per unit area at the edges of the tape. If the tape still doesn't stick properly, then I use a putty knife to seal those edges. That said, I ever put the to the lowest degree amount of pressure necessary on the tape when taping ceilings, because apartment ceiling paint is not durable, and the tape may pull off the existing paint when you peel it off.
- I make at least ii-inch-long overlaps when connecting two sections of record (as shown in flick below).
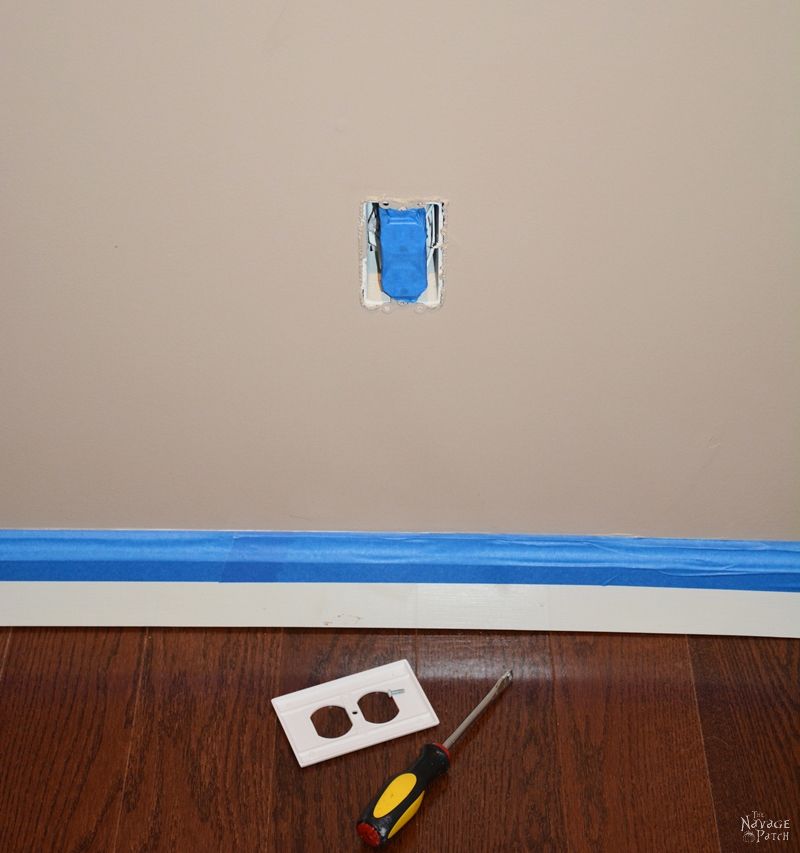
Once I am done taping the trim (meaning baseboard and all other woodwork) and ceiling edges, I remove all the wall plates and record the front face of the outlets and switches – of grade without touching any cables! I do this and so I tin paint over them without having wearisome downwards in those areas.
Hint: after I remove the wall plates, I put them in a pocket-size Ziploc bag together with their screws, then I won't lose the screws.
Subsequently taping, I get ready for the dingy work. I put on my painting clothes (old wear that I don't heed ruining) and a bandana to protect my hair from the grit and possible paint splatters.
Since our house is fairly new (built in 1996), I don't test the existing paint for lead. But if you are living in a house that was built before 1977, so make certain to exam the existing pigment for lead before you do annihilation with those walls and trim. If the existing paint contains lead, so skip the next step (which is repair and sanding), equally exposure to lead-pigment dust or chips can crusade serious health problems. Please take proper safety precautions when dealing with pb paint, considering nosotros beloved having you effectually as our reader! For fifty-fifty more exciting safety talk please visit our Disclosure folio. 😉
At present that we are washed with the safe alarm, let'south move on to the side by side pace.
I repair the walls, if needed, and and then I requite the walls a skillful sanding with a sanding sponge. I apply very little pressure, as this is only to get rid of the uneven areas and to smooth the wall surface. Although while doing this little area I forgot to wear a dust mask, I suggest yous article of clothing 1, every bit inhaling pigment grit is not good for your lungs.

After sanding, I wipe the walls with a damp cheesecloth to clean them. If I am working on the kitchen walls, so depending on how muddy they are, I may apply a degreaser or TSP (Tri-Sodium Phosphate) instead, because paint won't adhere to greasy or dirty surfaces. And if I am working on the bathroom walls, so the prep takes me even longer, as I watch out for mildew spots. I brand certain to kill all the mildew earlier I re-paint the walls, because those spores can live under the paint and can ruin the newly-painted surface in the long run. As I said, I never cut corners with the prep work when painting walls!
When I am finished cleaning the walls, I vacuum the baseboard and the floor, and so that grit on the floor (from sanding) won't become kicked back upward and stick on the walls while I am painting. And with that, the walls are ready for me to pigment, so I gather my tools and supplies for painting.
Tools and supplies
Ladder: I apply a ladder by and large for taping and painting the wall edges where the wall meets the ceiling. As ladder incidents happen quite frequently, I effort to minimize the need for a ladder, and I ever be very conscientious when I am using one. I suggest you lot do the aforementioned. Recall: prophylactic e'er comes first!
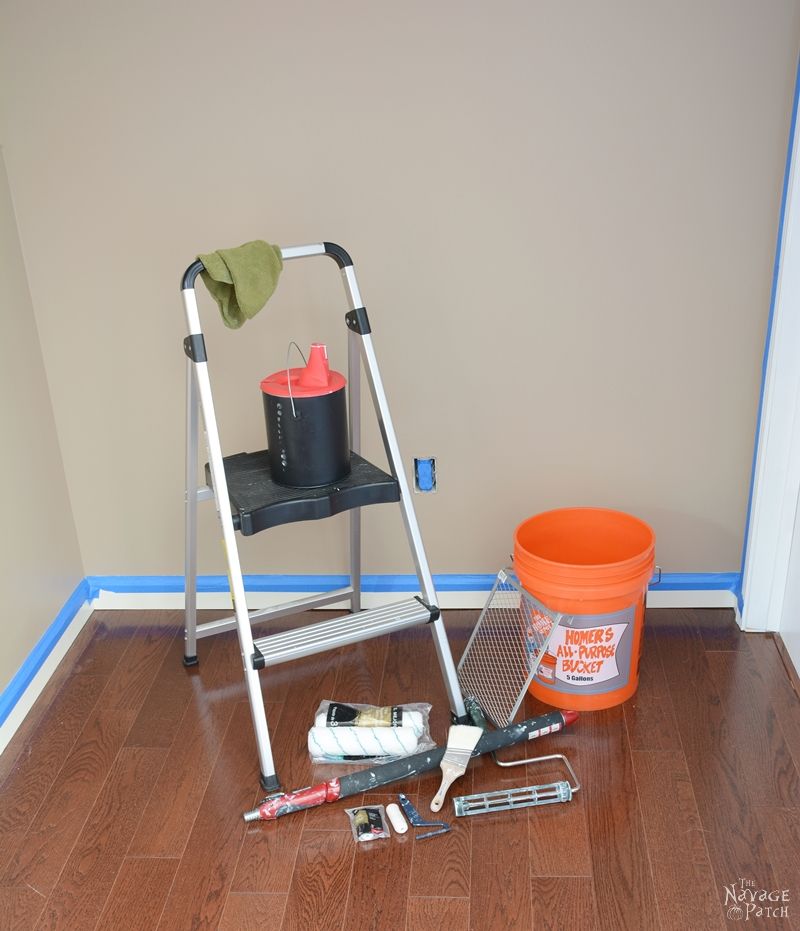
Extension Pole: I think an extension pole is equally important equally the roller or the paint itself, considering it minimizes the need for a ladder, and it may even speed up the painting process! I call mine "my little life saver," and information technology'south not an overstatement. Seriously! It is applied, light weight, sturdy, and it simply eases my life, equally it extends with the push of a button. Also, it is non at all expensive compared to others I've seen at our local hardware shop. I couldn't recommend information technology more, every bit it saves a lot of fourth dimension and endeavour during painting.
Roller (roller frame): There are basically two things you need to consider when choosing a roller frame: the size and the squeakiness. Aye, you read it right…the squeakiness! If you lot are planning to pigment a big room and happen to accept a "Holy Squeak" similar my former one, it volition suck all the joy out of painting! Information technology may even drive you insane! LOL. So when you are ownership a roller frame, but check if the frame turns/spins without any problems when yous utilize a little pressure. Paying a little bit more than for a quality frame will pay off if y'all have a big job ahead of you. Trust me!
Although you may find several sizes at your local hardware shop, 9 inch frames are what nigh DIYers utilise. If you are considering a bigger size (such every bit 14″ or 18″), unless you are a professional painter and have lots of surface to paint, I would propose you to reconsider, as they are hard to control. 😉
As I mentioned before, I try not to apply a castor, considering I don't like having a brushed band on the walls I paint. That is why I also have a mini roller which works wonders in tight areas or edges. If yous'd rather use a roller than a castor, and then I highly recommend getting a mini roller, every bit I am certain you'll love the speed and operation this fiddling guy volition provide you.
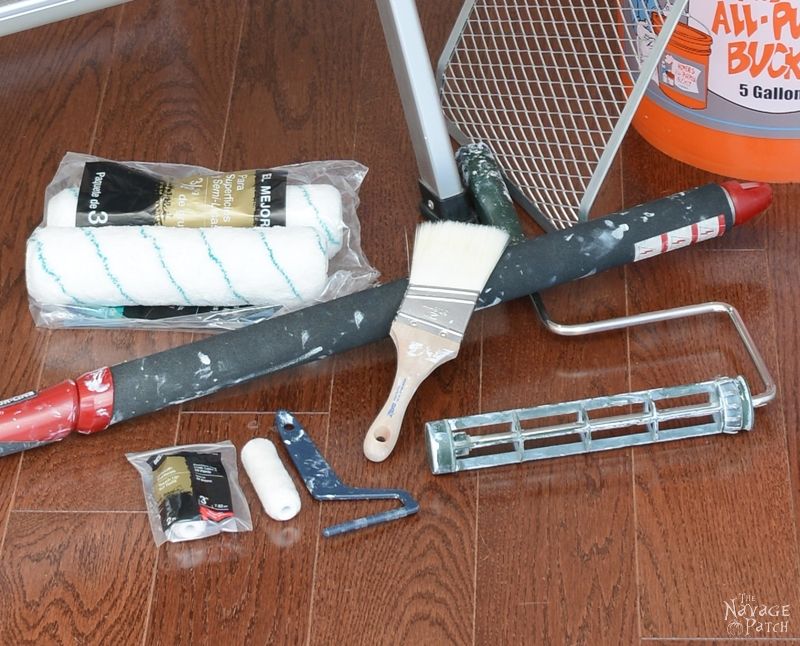
Roller Cover (Sleeve): The rule of thumb for buying a sleeve is the smoother the surface and the higher the sheen, the shorter the nap length should be.
- Brusque nap (1/iv″ to iii/8″) for smooth surfaces, especially when using loftier-sheen or oil-based paint.
- Medium nap ( 3/eight″ to i/2″) for apartment, low-sheen or semi-gloss paint. Basically it is suitable for nigh every wall in a firm 😉
- Long nap (1/2″ to one″) for rough surfaces such as popular-corn ceilings, textured drywall, brick or masonry. When using a long nap sleeve don't overload it with paint, every bit long-napped sleeves tin create quite a chip of splatter.
Although most DIY websites online will recommend buying a high quality roller cover (which are pricier), I like using Home Depot'due south "Best nine inch (3/viii″ nap) microfiber roller cover" when I paint. It may not exist the best roller comprehend out there [no pun intended ;-)], but I have e'er had proficient results with it. Besides, information technology is inexpensive enough for me to throw information technology away after painting instead of dealing with the hassle of cleaning.
Cut-in Brush:I merely use a paint castor when the area is besides tight to paint with a mini roller. If you are familiar with my pigment projects, then you would know that my all time favorite pigment brush is Zibra. One time you use one, you won't want to use any other castor, as no other glides on a surface or carries the paint also as a Zibra does. Depending on what I am painting, I either use a Zibra 2-inch cut-in brush or a Zibra 1-inch square paint castor. If I can't find a Zibra cut-in castor at our local hardware store, then my second option is a Wooster 2-inch short bending sash pigment brush, equally information technology feels very comfortable in hand with its flexible handle.
Here's a hint for choosing the right brush: if you are using oil-based paint, go for natural bristle brushes, considering they hold oil-based paint better than constructed bristle ones. But if you are using latex paint, then get for synthetic bristle brushes, such as nylon or polyester, because constructed material won't absorb h2o like natural fibers.
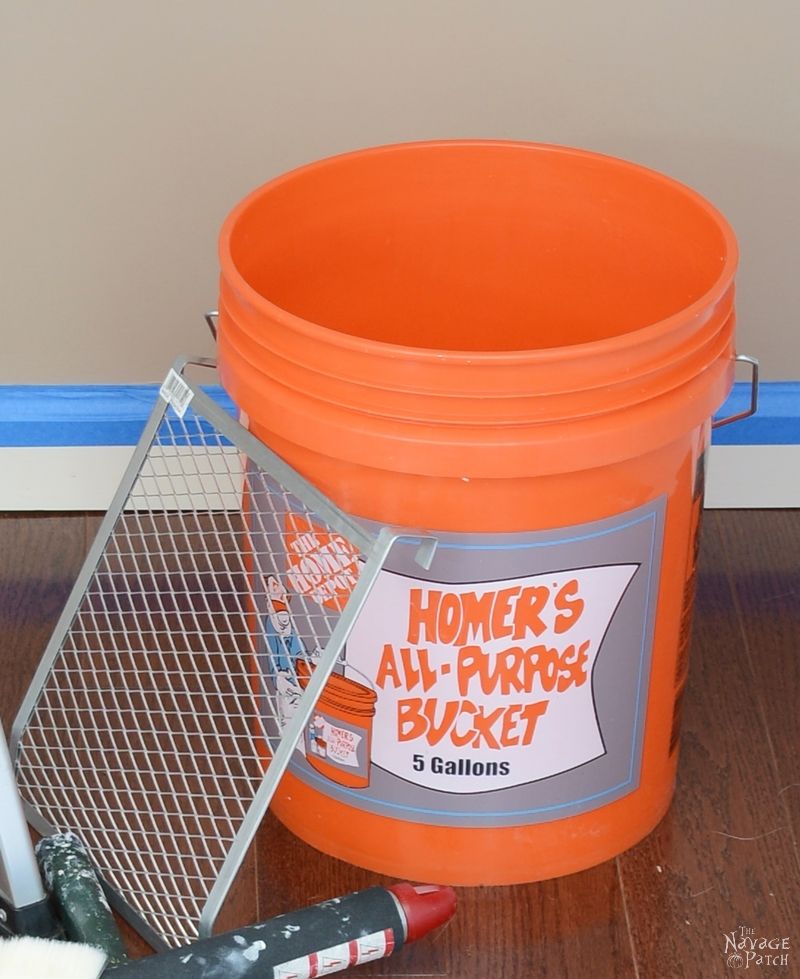
Paint Bucket and Roller Screen/Grid:If you are planning to use a paint tray to paint a room, I urge yous to instead buy a pigment bucket and a roller screen. I don't want to diameter you with all of my reasons why, but you'll exist glad you did! 🙂
Paint Tin can Comprehend With Pour Spout: This is optional, but it is again 1 of those little tools that makes your life easier. Nosotros have one for every open tin can of pigment. I haven't tried any other brands, but I can swear by the one we have: it is practical and easy to use. Fifty-fifty in long-term storage, it keeps the paint from drying out much better than the paint can'south original hat. Information technology is simply awesome!
Before using a paint tin can cover with a pour spout I used to poke holes in the rim of the tin, so the paint could drip back within later on each cascade. If you don't poke holes, the paint volition dry out in the rim, and you'll have trouble putting the lid dorsum on. But with these pour spout covers, I don't go through that trouble anymore.

Drib Cloth:I know, I know…you oasis't seen a drop fabric in the pictures till now (nor volition you be seeing it in the upcoming pictures!), because I don't bother using one when painting small areas. Besides, our offset floor is hardwood which has a good protective coat, so wiping off paint drips is easy. That said, anytime I pigment a room that has porous flooring such as carpet, blank concrete, tile (grouting is porous) or unprotected wooden, I definitely use a canvas drop cloth.
I know there are cheaper options, merely if you lot can afford information technology, I advise getting a canvas drop cloth, equally it is the all-time. Offset of all, it is the most resilient and durable one out at that place. One time you purchase it, it will concluding you for years. Second, information technology absorbs pigment without letting it seep through to the flooring like sparse bed sheets would exercise. Plastic driblet cloth won't allow paint spills and splatters to seep through either, but the pigment doesn't dry every bit quickly on a plastic drop material as it does on a canvas one. And guess why that is important? Well, if you lot step on those pigment drips, which y'all nearly likely volition [feel talking here, hahahaha :-D], yous'll end upwards carrying it all around the room.
If you are worried about a sheet drib cloth being slippery (since y'all tin can't really record it down as well as yous could with plastic or paper ones) you may want to try the ones that have rubberized backing.
Some other matter to keep in mind for a drop fabric is what you are planning to paint, and if you are using paint sprayer or not. If your project is painting ceilings or if you are planning to utilize a pigment sprayer, then a plastic driblet cloth or erstwhile bed sheets would be a better option in terms of cost, since you'll need to cover a lot of space.
Clammy Cloth: I always keep a damp microfiber cloth with me to wipe drips and splatters. Although I rarely demand/use a dry textile, I even so continue one close and handy: my painting clothes! hahahaha 😉
Goof Off: This is once again optional. I rarely utilize it, but I thought I should list it, as it does a pretty skillful job to make clean paint off about everything.
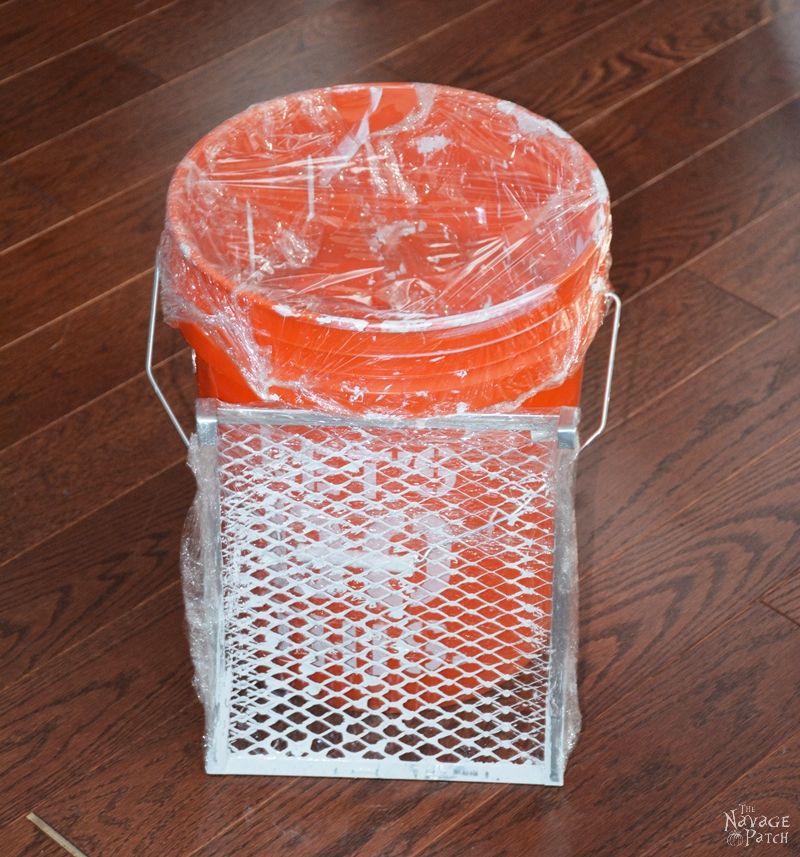
Cling Pic (Saran Wrap): If I need to give a break for more than 10 minutes, or if I am waiting for the first coat to dry, so I use cling film to wrap my roller, brush, paint and the paint bucket. Trust me when I say this: no plastic handbag or roller/brush comprehend is as practiced and airtight as cling picture! Simply with cling film tin you let your paint await a day in the paint bucket or on the roller without worrying most information technology drying.
And with that, we are ready to go started!
Outset rolling
Commencement, I rinse my paint saucepan and dry out it with a lint-costless cloth to make sure there is no grit in information technology. Then, I moisture my hands slightly and rub the roller comprehend iii-4 times. By doing so, I clean the roller comprehend from any loose lint and fibers. In one case I am washed with this lilliputian prep, I pour the pigment into the bucket and adhere my roller to the extension pole.
To load my roller for the beginning time, I dip it into the bucket about ane/2 inch and start rolling it up and down against the screen. I repeat this stride and by the fourth or 5th round, my roller is loaded with a good corporeality of paint.
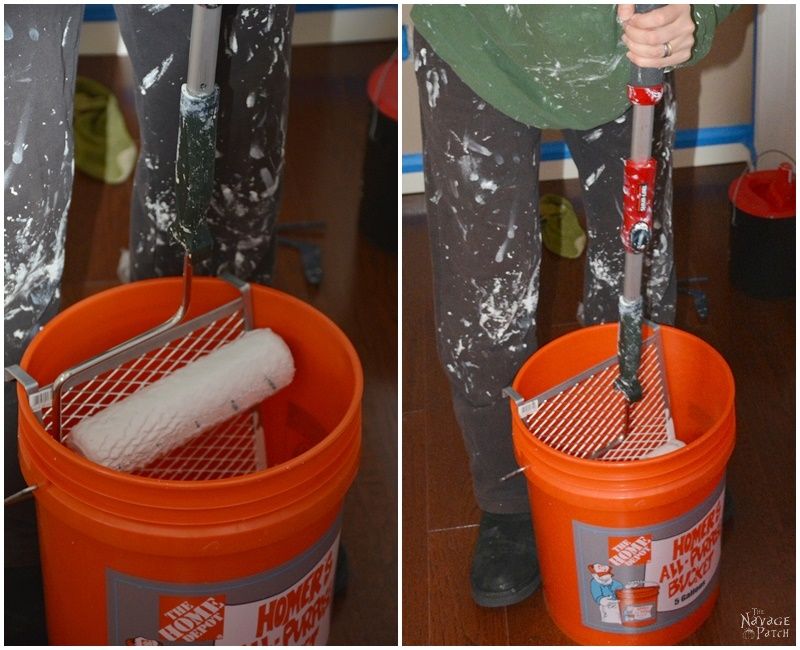
I know submerging the roller into the bucket seems irresistible, but don't do it! Once the roller is submerged, paint volition seep into the small gaps between the frame and roller cover and will get trapped at that place. Subsequently on, that trapped paint will notice it's style out in the form of millions of splatters!
For the same reasons, if y'all demand to put your roller down for a minute or two, don't douse it in the saucepan. Simply identify the handle's U-shaped neck on elevation of the grid, then it hangs without touching the paint in the saucepan.

Once my roller is loaded, I start painting. I start from one end and motion continuously toward the other stop of the wall, because keeping a moisture edge on the wall is the key to avoiding lap marks.
If I am painting a normal-height wall (8 to x anxiety) I make a "Due west" shape and starting time spreading it to fill in the gaps. Just with walls higher than 10 feet, I brand an "Northward" shape. A higher wall means that I will be spending more time reaching all the way up and downward, so I don't similar to go to far horizontally with each roller of paint.
The key to easy and neat painting is never to force the pigment out of the roller. In other words, don't press the roller likewise hard confronting the wall. If you need to press hard just to get some pigment on the wall, that means at that place is not enough paint left on the roller. At that point, just load your roller once again.
Depending on the area, I always exercise ii coats of paint, if non iii, as this is the usual standard in the construction industry: one glaze of primer + two coats of paint. Merely nowadays, many paints come as paint and primer in i, then I skip the primer coat and just do two coats of paint. That said, if I am painting a brand new wall (bare drywall) I usually go for three coats.
Get-go Coat
When I am painting the beginning coat, I ever start with the master area and then move on to the edges. In the chief area, I push my roller every bit close to the ceiling border as possible. As can be seen from the pictures below, taping the ceiling edge helps a lot throughout this process. That is another reason why I e'er utilise 1.88″ original blueish painter'southward tape. Since it is as broad as a roller, it forgives your possible mistakes in advance. 😉
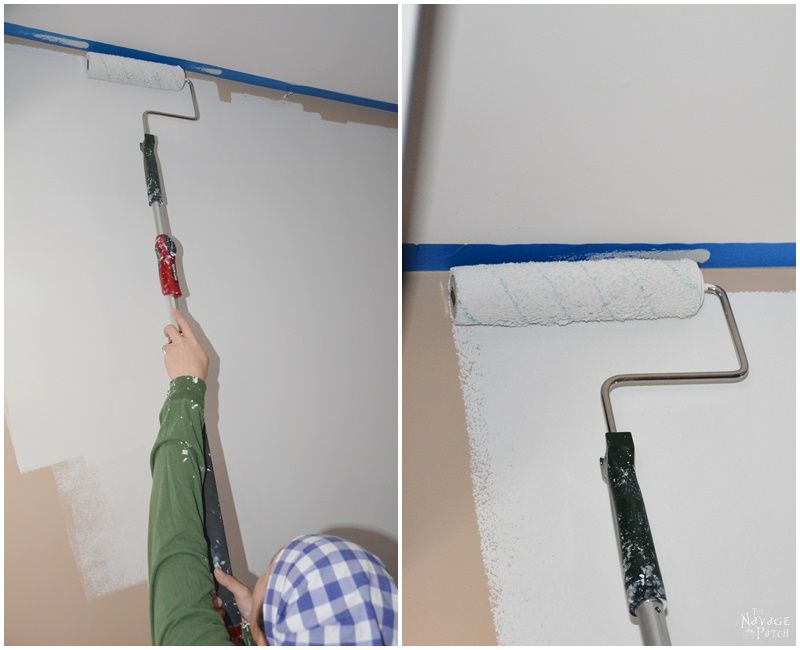
Once I am washed with the big master area, I movement on to the edges. During the get-go coat of painting, I endeavor not to load my mini roller as well much, as it helps with locking the tape's edge even better.

As for the trim's edge, I just gyre correct to information technology. It has been three years since I painted my first wall, and I experienced seeping paint only 3-4 times to engagement. That is why sealing the tape's border is important, every bit it saves you a lot of time with your paint process.

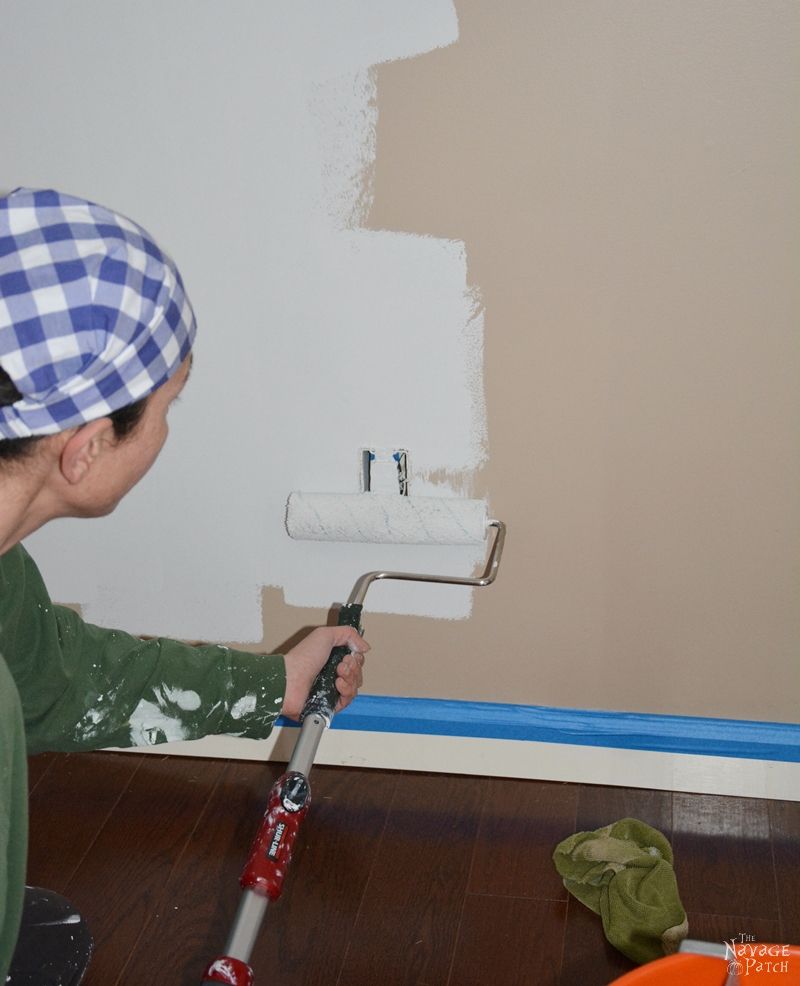
The same goes for the outlets. Since I taped the outlets, I tin paint right over them. All these may seem similar small details, merely they help with the painting speed. Keeping a expert step is important to have a uniform spread, which of course furnishings the overall finish.
If I see haemorrhage (surface drips), I roll my roller over them:
- I never utilise my mini roller for these drips, only my nine inch roller.
- I apply calorie-free to very low-cal pressure to my roller.
- I don't utilize a newly loaded roller or an empty roller. If I just loaded my roller, and then I carry on with my normal painting, and when the roller is back to a normal load, I become dorsum and roll over these spots.

And with that, I finish the first coat of paint on the first wall and move on to the commencement coat on the adjacent wall.
In one case I cease the starting time coat for all the walls, I check the surface for drips, roller lint, or other imperfections, and if I run into any lint, I choice it off with my fingers and roll over that spot once once again.
In between the two coats, I usually give nearly 1 to 2 hours for the paint to dry. If the room is large, then (ordinarily) by the time I end the last wall, the first wall would be dry, so I can start the second coat right abroad. But if the room is small, and so I get-go wrapping my tools with cling movie and expect until the first coat is dry.
I cut a large slice of cling film and place it directly on the paint in the bucket. I also put cling picture over the inner walls of the bucket, so the paint splatters in that location wouldn't dry, flake off, and get mixed into the good pigment. I endeavour not to go out any air bubbles when placing the cling movie.
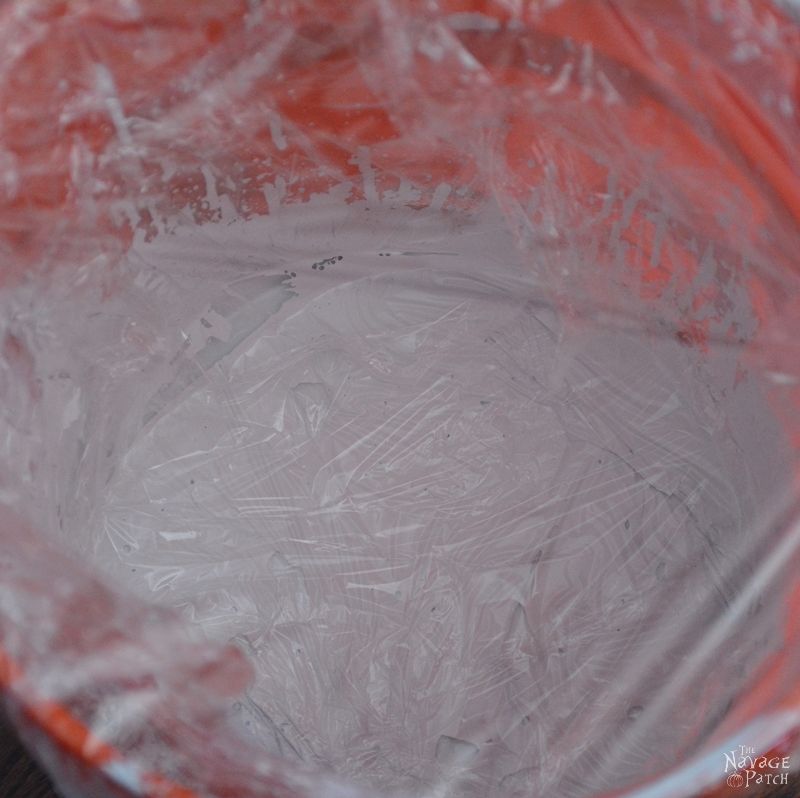
One time I am washed with the inner part of the bucket, I also wrap the top, and then everything is covered properly. Then, I wrap my roller and the roller screen, then I don't have to deal with any dry out paint particles when doing the second coat.
Here is a handy hint for y'all: if you tin't start the 2d coat on the same twenty-four hour period, put the saucepan and all the wrapped tools in a cool space. Cling picture show helps to go on the paint and the rollers intact for a full mean solar day, but in a cool infinite, you can prolong that duration for another half a day. In cold temperatures paint takes longer to dry.
If you lot are painting in winter time, the paint on outer walls volition always take longer to dry out than the interior walls. Earlier y'all start painting the second glaze, e'er first check if the outer walls have stale.
Second Glaze
When doing the second coat, I change the sequence: I kickoff with the edges, and then movement on to master area. This fourth dimension, I load my mini roller normal since I need to keep a wet edge to avoid a "band-expect" (professionals call it "hatband".)
I always start with the starting time wall I did when I painted the first coat, and then the drying time remains the aforementioned for all the walls. Then the rest is the same. I load my brush and continue rolling until I finish the entire room.
Here are some bonus hints:
- Many professional painters "box" their paint. In other words, if they have multiple cans of the same paint, they cascade all of them into the pigment saucepan, mix them together, and so pour them back into the paint cans. This is done to avoid the slight variations of the sheen and color which the color mixer at the paint shop may cause. Y'all may want to do this, or you may want to become with my method instead: when starting a new wall, I make certain my paint can won't finish halfway through a wall. If information technology seems like it will, then I utilize a new can and go on the one that was already open for future touch-ups.
- Before loading the roller encompass for the outset time, I make sure that I pushed it fully onto the frame. Otherwise, the roller cover volition start sliding out picayune by picayune, and every time I load my roller, pigment will become trapped in-between the roller frame and embrace. And y'all know what happens then, right? Trapped pigment finds its way out in the grade of extra splatter. And then in the aforementioned context, if in the beginning I don't accept much splatter, but afterward on happen to come across a lot of splatter, I showtime check if my roller embrace has slid from its place. 😉
- When painting a room with a popcorn ceiling, since it is almost impossible to record the ceiling, I run a flathead spiral commuter along the ceiling edge. This creates a a modest groove and helps me cut in without getting whatever paint on the ceiling. I have to say, this pace helped us a lot when we painted Greg's grandmother's firm, as all her rooms had textured ceilings.
- I never utilize the sample paint for touch-ups, as the sheen may not be the aforementioned. Likewise, the quality of a sample of paint and a gallon or a quart of pigment is never the same.
- I also never use a brush for touch-ups. I either utilise a proficient sponge brush and dab it on the wall to have the same roller issue, or I apply my four″ mini roller. Although at that place are fifty-fifty smaller rollers, I choose my 4″ one, because the smaller ones may not have roller covers with the aforementioned nap thickness.
- Since latex paint takes well-nigh xxx days to cure, regardless of the sheen, I don't clean the walls before the paint cures. Although semi-gloss and satin sheen paints are more than durable than others, that durability comes into total event after the curing menses. That said, whatever material that has a curing period (such equally concrete, or paint) achieves about of its strength and immovability past halfway point of that curing menses. Therefore, if the walls go dirty before the paint is cured, I wait until at to the lowest degree xv-20 days to make clean them, or if it bothers me likewise much, I just do a quick touch-up.
Finishing and cleaning
As soon as I finish painting the room, I become to the get-go wall I painted and start removing the painter's tape from the ceiling edge and the trim. In other words, I try to pare of the record while the second coat of paint is even so wet. That way, I don't run across the usual result: the new paint'due south film peeling off together with the record. But if the second glaze has already formed a tough film before I've had the chance to remove the record, then I apply a utility knife to slightly score the edge to release the paint film before pulling the tape.
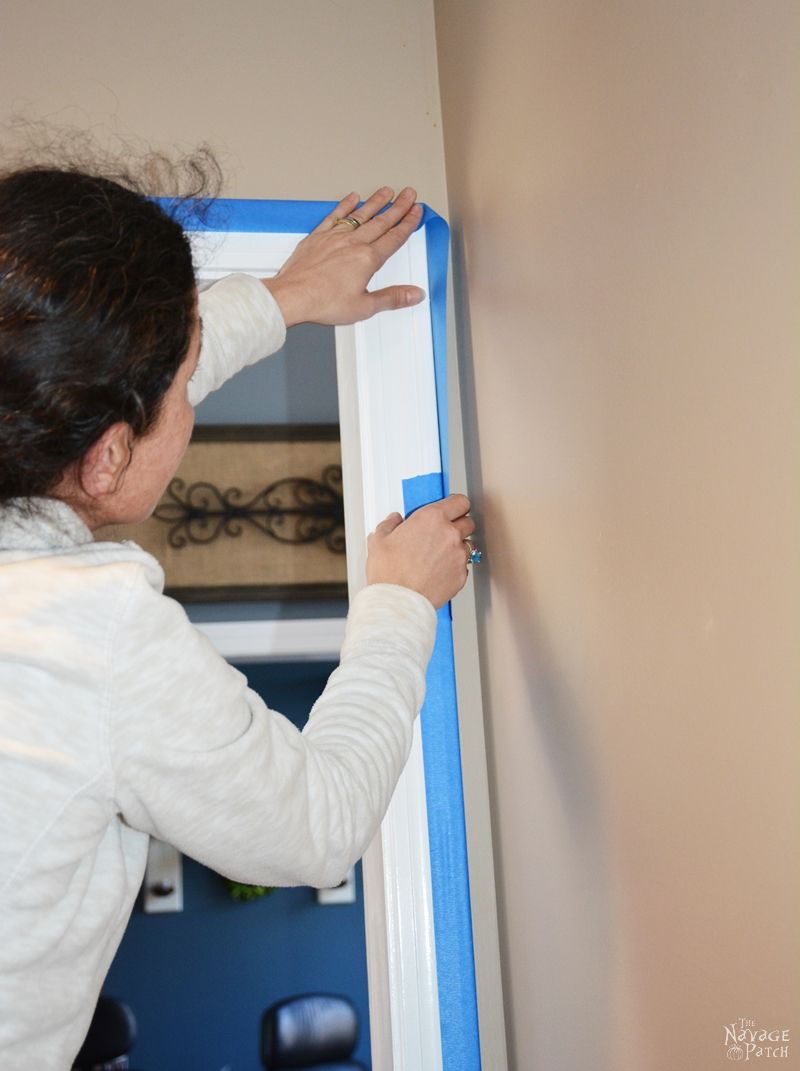
When removing the tape, I pull it at such an angle that it is near like pulling the tape dorsum over itself (as seen in the picture below).
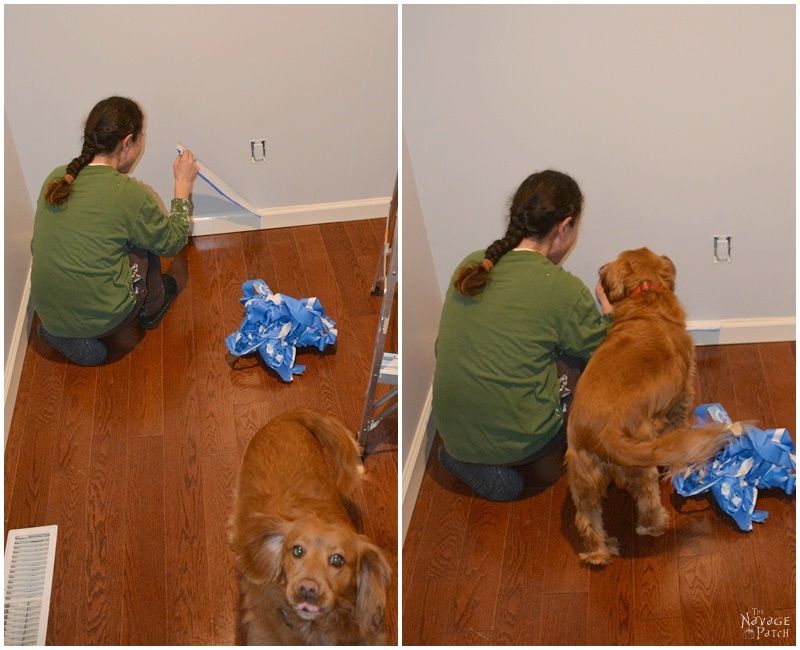
Another hint with removing the tape is to move your hand closer to the pull point, and then the altitude betwixt wouldn't exist more than a foot. Since pulling the tape tin exist tricky, I sometimes ask for for advice from our Master Tape Puller pictured above! 😀
When removing the ceiling tape, I try to exist gentle, every bit ceiling pigment is not durable enough to withstand a strong pull.
One time I am done with the painter'south tape, I move on to storing the leftover paint. Using a paint strainer, I strain most of the paint back into the can. Afterward closing the tin can'south cover, I write the room'south name (and which walls, if applicative) on the can and store information technology in our basement, as it is a cool and dry surface area. Equally we don't have a utility sink, I don't clean the paint bucket directly away. Instead, I permit the paint dry entirely, and so I skin the paint from the bucket. Doing it this mode saves me the mess and a lot of hassle.
Then I make clean my rollers. Well…I but clean the roller frames, since I throw away the roller covers. I apply warm to hot water and latex paint just washes right off of my roller frames. If I used a brush, I launder it with warm to hot h2o using a pigment brush cleaner and some mild dish lather.
I give at least 24 hours for the paint to build a moderately potent film before I put the wall plates dorsum in their places. In one case that is done, my painting projection ends.
If you lot managed to come this far, particularly without taking any breaks, KUDOS TO You! 🙂 Did you know yous read 6200+ words? I know information technology seemed like a modest novel, but as y'all can see, when the topic is painting, I have difficult time keeping my oral cavity shut (or my fingers from typing)! LOL 😀 Joking bated, I promise y'all establish it interesting, informative and most importantly, aconsummate guide on how to paint a room!
Handan, xo
Don't forget to salve this idea to Pinterest, and so you can observe it once again subsequently!

Source: https://www.thenavagepatch.com/painting-101-how-to-paint-a-room/
0 Response to "What Is the Best Temperature to Paint a House"
Post a Comment